Friday, June 28, 2013

Pretty Little Pumps

Let me just tell you, the thrift store is awesome.  No, it really is.  We have 3 Value Village thrift stores near us (my cousins and their friends call Value Villages the VV boutique....:P) and on the last Wednesday of every month everything is half off!  So things that would normally be $2, $1.50, $3.75 and stuff are HALF off.  For example, we bought a muff for $1.75 that was real rabbit fur, a $1 regency bonnet for Caroline, and some sheer-ish--netting-ish stuff for my civil war bonnet that was only $.75 this past Wednesday.  That is AWESOME!!! And a month ago I bought a pair of heels for $1.50 that were my size, and they will work for WWII re-enacting. :D

One thing you have to do when shopping at the thrift store is keep your eyes open for things that can be turned into something else (sheets that can be turned into a ballgown, a curtain into a shirt, a pillow case into an apron, buttons of a hideous leopard print dress for a civil war buttons, shoes that can be cloth covered for a certain time period, hats that can be re-shaped or re-trimmed, pants that can be re-fitted, etc.).  When I saw these shoes they didn't look like 40's shoes.  They had this huge velvet ruffle (two velvet ruffles actually) on the T strap.  But because of the way we shop, I saw them and thought "hmmm...nice heel shape, T strap, all black, my size...$1.50" and so I bought them.  But they needed a little work, so here is what I did.  

Sadly, I don't have a before picture.  But the ruffle was obnoxious. 

Obviously, I seam ripped the velvet stuff off.  Once I had done that I realized how beat up the strap looked and realized I needed to cover it. So....
Shoes and ribbon
First I found some scrap black ribbon, just wide enough to cover the front of the T strap.  Then I cut it a little longer than the T strap.
ribbon lengths for T strap
I sewed it over the strap but not actually to the strap.  (On first shoe I did sew it to the leather and it puckered a bit)

needle in on one side of ribbon (not through the leather)

needle out on other side of ribbon (not through the leather)

this is what it looks like on the back-you can see the cris-crossing
thread

after and before
both straps covered
 Now that I had the T straps covered, I had to cover that messed up part at the base of the strap.  When I removed the velvet, it removed some of the "leather" covering on the toe too.  That needed disguising.

I  made little ribbon bows to put over that spot.  To do this, I made a ribbon loop, and then gathered it up the center.  After I stitched it down to the shoe the project was done!
making the bow

Tada! Finished bow


doesn't the lighting even look vintage? :) We had a lot of rain which made the
humidity so awful that it fogged up the camera lens and made it look
like this.  We only snapped a few pics 'cause we didn't want the
camera to get messed up.  But the fog really added to the dynamics of the
pics!
There you have it! Pretty little pumps! :D

~Theresa

Thursday, June 27, 2013

A Civil War Corset for Caroline

So I made my little sister a pretty dress.  There was a problem.  It wouldn't meet in the waist. (arg...the problems of sewing without a pattern....)  So I had one option, and that was to make her a corset (she had been bugging me about one anyways), and so I did.  And I'm sure this is like totally not period for a 13 year old, but it's boned with steel.  I figured if I was gonna cinch, I'd better cinch, and she didn't want a corded corset and hey, the boning kit was only $28 with shipping.

I am  not an advocate for tight-lacing.  I think it's bad for you, and vain.  But, Caroline is only going to wear this dress one time, and just for one day, and if she stays inside in the air conditioning I think she'll be alright.  I am going to pack her other dress just in case I change my mind and decide that the corset should be laced looser.  She does have a little bit of a squishy middle, and with 3 inches off her waist in the mock-up she felt fine, and she could breathe easily.  I have 3 inches off my waist when I wear my corset, and it's just *slightly* uncomfortable, but it's not at all tight-laced. And I don't have a squishy middle at all.   Her waist only needs to shrink about 1 1/2" past the mock-up waist.

Bascha is making a civil war corset off of the same pattern (Simplicity 2890) and she's also making a blog post out of it. (hers really is lovely, I haven't seen the flossing yet but everything Bascha makes is really nice-not just nice looking but well constructed too.  She likes to pay attention to the details, like the lining, and the flossing, and the little things that make something truly wonderful.  You'll like her things, I promise! She really is a seamstress...I'm just a seamstress in training :P )  So I'm not going to give any details so much as to how I made this corset...just some pictures of the finished thing.

I bound the corset with white cotton bias tape, which worked better than the twill tape I bound (parts) of mine with.  (Now that I've made hers I want to go and re-do parts of mine....) The corset itself is two layers of cotton twill (very sturdy cotton twill), and the flossing is done with cotton embroidery floss.

whole corset

I did decide to add some lace at the top, it's very
feathery and feminine and she likes it
 All the bones are flossed at the top as well, but the flossing is white.  I only did colored flossing and designs at the bottom of the corset.
triangular flossing on the angled back
bones

flossing on the bottom of the back bones (by the eyelets)

 There are no grommets yet--I don't have any grommets, much less the grommet making machiny thingy.  Bascha does though, and she lets me use hers :D  So next time I go over to her house, voila, the grommets will be there!

the bottom of the corset


the front and busk
Now I'm done with corset making for a while...on to more drab things like fixing shoes, hemming pants, making boys shirts, painting bonnets and sewing button holes. :D

***UPDATE***
Her corset has grommets now, and her corseted waist is 23 1/2 inches, so it only took 4 inches off, which isn't too bad.  Mine, I found out, only takes off two. :P  For laces, we are using the kind of ribbon that has horizontal lines on it...maybe it's called grosgrain...I"m not sure. You can't pull hard enough with the twill tape we have-it just tears into pieces.  This ribbon is very sturdy and is working quite nicely though!

I'm so happy....the gap is even all the way down! Yay! :D

~Theresa 

Tuesday, June 25, 2013

Regency Pin-Tuck Apron

Who needs an apron?  I sure do!  Whenever I'm cooking or cleaning here around the house I'm always forgetting to put on an apron...and thus ruining my clothes.  My clothes now-a-days are precious, yes, but not nearly as important to me as a historical dress I spent days creating.  And the dress that came to mind at first was my newly finished Regency work dress.  I spent days sewing tiny little stitches-and I don't plan on getting grease or red clay smeared across any part of it.

So, I made an apron.  And I figured since I had hand-sewed the dress, I should just hand sew the apron too. Yes, hand-sewing goes by faster than one would think, but I've never longed for a project to come to an end as much as that apron.  It has come to an end though, and part of what motivated me to complete it was the prospect of making a blog post out of it! :)

I've made one regency apron before.  It was a quickie- I needed to wear it the next night for a Christmas cooking demonstration.  I'm ashamed of that apron.  Everything was raw edges...machine sewn, not rolled hems, non-matching bias tape for ties and waistband-just horrible.  These pictures make it look better than it is.

But happily, I'm not ashamed of my new one (well ok, I'm still ashamed that I never can sew on hook and eyes properly), or I should say, not as ashamed of my new one :).  To be honest, I LOVE it! :D  I used white cotton sheets (from the thrift store), and I only used, um, maybe like 2/3 of the sheet.  The skirt part of the apron is very full, the sheet was a little bigger than a twin sheet, which was good because I like full skirts.
(pic of waistband with caption)
First of my inspirations for the apron, was this charming, diagonally tucked apron that Sarah from the Romantic History blog made. I just like how the bib detail gives some interest to an otherwise bland utility garment.  Just because it's practical doesn't mean it can't be pretty! :D
she has such great skill, her things amaze me
Also was a bib front dress a friend of mine made.  I loved all the lovely tucks on the front!  Sadly, I don't have a picture, since it is currently on display in the Latta Plantation house, and no one is allowed to take pictures in there.

And since I had a total of 6 hours in the car, and since I miscalculated as to how many tucks there would be *grin* I sewed a total of 14 little tucks across the front.  You can see that on one side, two tucks are closer together than any others.  Why?  Because I forgot to bring a measuring tape, and I was impatient, so I guessed and...guessed wrong :P.
tucks
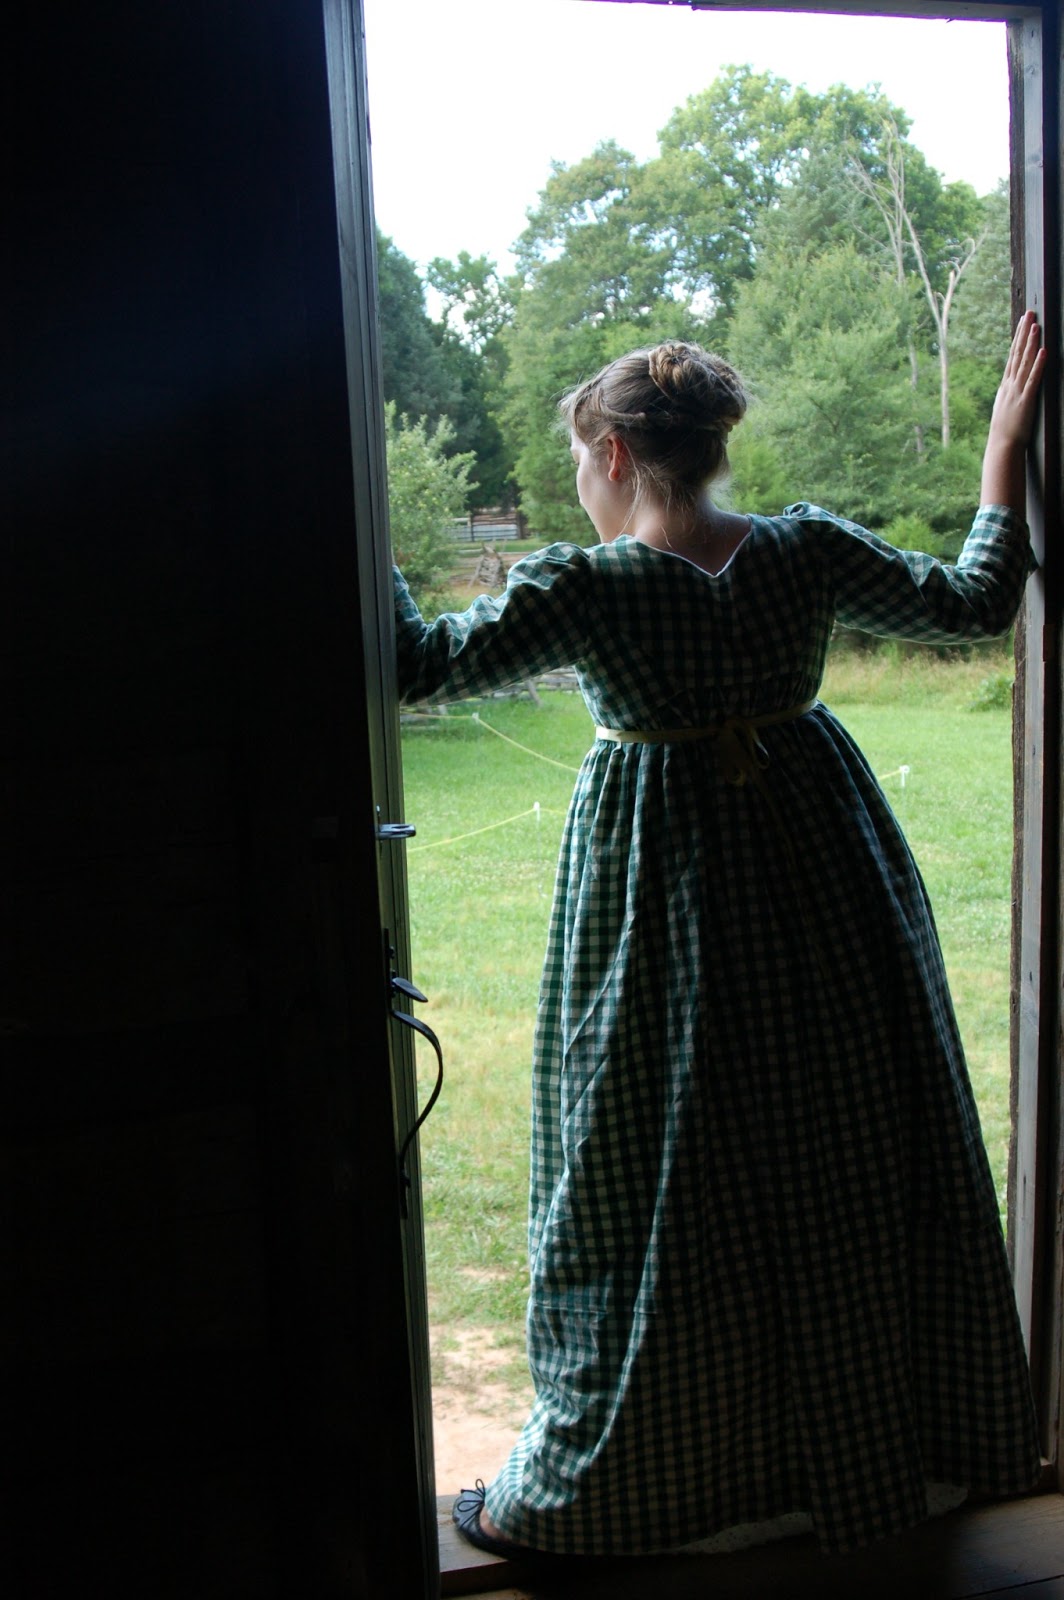
you can sort of see the back here
the full skirt

So yeps, that's my new Regency apron!  Total cost was about $1.50, and total time maybe 8-ish hours?  I did not use a pattern.  To get the length you want for an apron, all you do is hold a measuring tape under you bust, and then step on the end of it so that it stays taught.  Pick a place you want the length to be, and add a few inches.  Usually when I sew by hand I use 1/2 inch seam allowance, and for this apron I did a narrow rolled hem, so I added 1 inch to the length I picked to allow for that.  You can do a larger hem at the bottom to give it some more body and stability.  I find larger hems less puckery when sewing as well.  I used two rows of hand gathering at the top to

When doing the bib, I took a measuring tape across my bust (about from edge to edge of the bib in the pictures) and said that was how wide I wanted the apron to be.  Then I added an inch to that measurement to account for narrow rolled hems on either side.  For the length of the bib, I put one end of the measuring tape at approx. the top of my bust (or about 3 in. above the middle of my bust) and then measured to right below my bust where the waistband would be.  Then I added an inch for seam allowance and the rolled hem at the top.
front of bib, corner where strap is

The straps go on the far edges of the top of the bib.  I attached the straps by folding under the raw edge of the strap and then stitching it down on all 3 sides, as well as where the top of the bib was on the strap.  I whip stitched the strap to the bib fabric.  I made my straps, I think like 2-2 1/2 wide and then folded them in half and stitched along the edge.
inside of bib, where strap is

For the waistband, I ran the tape around my body directly under my bust.  Then I added an inch or so for the hook and eye overlap in the back.  You can make the waistband be a couple inches, an inch or less than an inch wide.  I made mine between an inch and an inch and a half.  You can either attach the straps directly to the waistband, or hook and eye them to the waistband.  Mine are currently hook and eyed to the waistband, (because hook and eyes happen to be my sewing weakness :)), I may sew the straps to the waistband.
waistband...

underside of waistband
Overall, this was a very fun and necessary project. It's an upgrade for sure from my last apron and I think the accuracy of it is pretty good.  It's comfortable, pretty, useful, and I'm very happy with it! Phew that was a long post!  You could probably make an apron in the time it will take you to read it! :D  I hope the info can help if you are looking into making a regency apron yourself.  And, now that I've shared more than my 2 cents worth I'd better sign off!  Have a great week!
~Theresa

Sunday, June 23, 2013

Gingham Regency Dress

(forgive this empty white space...I messed up the html accidentally on this post...and I can't fix it :P)
For a while now I've been wanting a regency day/work dress.  Simple. Sturdy. Accurate.  Hand-sewn.  I've made a regency ballgown, but as you know, that probably isn't the best clothing choice when cooking or gold panning.  :)  I like the way the ballgown fit, but I had to make some severe modifications to the bodice to make it work. The pattern I used was a Rocking Horse bib front pattern, borrowed from Bascha.  I'm not really sure exactly what I did to the bodice (well really my mom adjusted it, she pinned it to fit once I had it on), but I know we changed every piece of it.  I also added more fabric to the front skirt panel.  I feel bad saying it, but I wouldn't recommend the pattern.  It wasn't worth the work. From my experience, it would be easier (and cheaper) to just draft your own.  Regency really is quite simple anyways. So on to the dress -because the pattern was already tweaked, I just traced my work dress off the ballgown and sewed it with 1/2 seam allowance.

The dress fabric is made of what I think is cotton duck- it was once a couch cover I bought at the thrift store.  It didn't say that it was cotton duck, but it said 100% cotton, and it's thicker and coarser than like calico for example, but not as bad as canvas.  I lined the bodice and bib with white cotton (sheets, also from the thrift store).  
I whip stitched the lining down over the skirt seam allowance
the dress closes in the front with 15 hooks and eyes

bib lining and casing

lining whip stitched over sleeve seam allowance
On the edge of each sleeve I embroidered a flower spray, from an original regency era embroidery pattern.  But I *cough cough* didn't follow it to a T so mine looks *slightly* different :P. I used cotton floss in subtle colors to fit the dress more.
For the sleeve , I actually used the sleeve from dress B of the Simplicity regency costume dress pattern. I shortened the length of it to fall just below the elbow, but next dress I'll more than likely make the sleeves just above the elbow. There are a ton of gathers at the top where the shoulder is, and if I were to make adjustments I would either pleat the sleeve into the armscye or make it slimmer so as not to create so much fullness.

So this is how the dress looks. I got to wear it yesterday for a Gold Panning event we had at Latta.


For the drawstring I used a yellow ribbon, and it ties right above the
gathers in the back. 
 And I also got to wear my new bonnet....yay!  Mom found it at a Goodwill for like only a buck, and the ribbon I trimmed it with cost a total of $4.  I trimmed it after doing some research Friday on original bonnet trimmings.
my new bonnet :D


top bow

Bascha and me

My short stays are working beautifully, but my shoulders did start to hurt after a while...wondering if maybe I'm wearing the straps wrong or something.


~Theresa

Friday, June 21, 2013

Regency Short Stays

Well, I finally did it!  Yay! My regency short stays are d.o.n.e. :)  Here's the run down.

The pattern I used was the Sense&Sensibility underthings pattern.  Her instructions were excellent, with drawings of pretty much every step.  The pieces went together great, and the shape and look of the stays is good as well. I bought the downloadable version because it was less expensive.  So, I printed out the test sheet to make sure the scaling was correct, which it was, and then commenced with printing out the supposed 28 pages.  Um, well, er, I'm not that computer savvy and I printed out 58 sheets of pattern pieces.  I think I have enough patterns now to even make my dad a pair of stays :P  Well, maybe he wouldn't like that too much.

The putting together of the papers was easy-I had printed them out with cutting lines and grid markings. It does get a wee bit puckery in some places though, I had to cut out some pieces before putting together the entire puzzle.
tracing, cutting, and taping the paper

taping the "puzzle"pieces together

the handy-dandy grid markings

getting ready to cut the pattern out
 I had to make 3 mock-ups.  I have an odd body type anyways, so I'll give the pattern some leeway for that.  But there was an issue that I had to fix that a lot of "normal" people had to fix too.  This particular pattern is large at the bottom, like around your rib cage.  Like large.  I would normally cut out a size 14 (my bust and hip measurement is between 16 and 18 actually, but my waist and "body" are smaller, normally around a 14), which I did for the first mock-up.  For the second mock-up, I left the back at a size 14, but made the front, I think, a 6.  Also, I shortened the straps by about 2 inches.  (I'm 5'4", so petite)  Now for an average person, making the stays a size or two smaller should do the trick.  My underbust measurement is 29.5 inches though, so I had to make another mock-up.  The smallest size the pattern gives is a 6, so I sized it down to about a 4.  I left the "strap nubs" (lol, I mean the part of the front where the straps attach to) at a size 12.

The gussets she gives are accurate.  I would be wary about drafting my own gussets, so I'm happy she put those in there.  The pattern has an A, B, C and D gusset.  Because I needed a larger gusset though (DD), I put the C gusset on top of the D and then increased the D by how much was between it and the C. Thus creating a DD. (or maybe an E, I'm not sure)

The fabrics she recommended were a lining of cotton, interlining of canvas, and "fashion fabric" of linen or cotton.  I bought 1 yard of canvas for interlining , but there is enough left over for a friend to use for the interlining of 18th century stays.  And yay, it was only $4 on sale at Hanncock's. :D I lined these stays with a sort of sheer peachy colored cotton.  And the outer layer is white linen which I got by cutting up a linen dress from the thrift store.  I hand sewed the stays entirely except (don't hate me) the canvas interlining.  I was torn about whether to hand sew it or not, but I have a deadline to have us all dressed by (this Saturday) and to save time and effort (canvas can be brutal to hand sew!! I broke 3 or 4 needles last time...) I just used my sewing machine.  Hey, no one is going to see it anyway.
cutting out the lining

gusset stitching

the front lining

pinning the gusset on the outside fabric
basting all 3 layers together

basting...
 To attach the layers I used a method called "stitching in the ditch."  You sew in the seams so that the attaching stitches are not visible.  I had some issues with the gusset "stitching in the ditch" because all 3 layers didn't quite line up. Forget it.  Stitch it so it looks pretty on the outside, the inside can just do what it wants, it's not like visible white stitches on the lining are going to kill me :P.
stitching in the ditch to attach the layers
 I made a total of 12 eyelets, 6 on each side.  Bascha has this fabulous machiny thingy that makes holes and sets grommets for you, (and she lets me borrow it for civil war corsets :)) but I don't.  So to punch holes I use a snap setting thing.  It looks  like a pair of pliers.  I put the punching side on one side of the fabric, and the hole side on the other and then push with all my might to make a hole.  Then I take a pencil and stick it through the hole and twist it around to make the hole larger, and then I sew my eyelet!
eyelets
eyelets and binding/boning channel
 I bound the stays with cotton bias tape, since I had it on hand.  On the very edge next to the eyelets the binding works as a boning channel too.  I boned this with some left over 1/4 reed.  The pattern says to put a boning channel on the other side of the eyelets as well, which I did on one side.  I didn't have enough room on the other side though, and I don't think it's bad without the bone there.  The pattern also says to make the bottom binding house a drawstring, but since my eyelets end at the very bottom, I sewed the binding shut.
top and bottom binding
When I got to binding the armholes, I had run out of bias tape in that color, and since white looked too large and harsh, I used some 1/2 twill tape.
armhole binding with white twill tape
On the side, right in front of the side seam I put one bone (zip tie).  And you can see in this picture the two diagonal bones (also zip ties).  These help with support, and to "lift" the bosom, and keep everything out of the armholes.  It feels SO much better with that boning there!
side 3 boning channels
Sadly, I can still lace the stays completely shut.  There is supposed to be a 2-2 1/2 inch gap. :( that's ok though.  The bottom of my finished stays measures 28 inches.  But they fit great!  It does not decrease my bust measurement at all, but it does shove everything way up there.  I put my t-shirt on over them just for fun and my sister and I almost died laughing.  If you're having a bad day, just go put on some short stays and a t-shirt. :P  With my short stays, I think I could wear an incredibly high empire waist dress.  Which is a good thing I guess since this is what the stays were designed to do.
Front.  It does lace completely shut.
If you have any doubts about whether or not to wear short stays or stays for regency, you should.  You can tell a difference wearing them and not wearing them.  They aren't that hard to make, they don't take a very long time, they are comfortable, and they're period correct!  I would recommend this pattern, in the download-able version.  Just please don't print out 58 pages! And before you cut out the real thing, make a mock-up to adjust if you need to.

These stays took me approx. 4 days, and cost between 2 and 3 dollars if you don't include the pattern.
~Theresa