
I'm not sure, but I think this may have been one of the most fun projects yet. I never knew how easy draping was! Or how fun! I was going to take pictures of how I draped this gown, but then I thought I'd wait for the next dress so I could make sure it turned out alright. It did :D Several months ago I had been looking through a photo album on the Margret Hunter Shop facebook page, where they showed a few images of draping a gown. I was in awe and thought draping was like the height of being a seamstress...that like nothing could be harder than that! But when I actually started pinning and cutting I found out it wasn't half as difficult as I imagined. All I did was hold up the fabric to her body in stays, use a pencil to make some lines (top of stays, side of body, where shoulder line should be, armhole, center front of stays, waistline) and then cut it out. I actually cut part of the dress out while the fabric was still draped on her! (mock up obviously). Then I sewed up a mock up of the bodice and tried it on her. I tweaked the armhole but other than that it was done. Not only was draping fun, but it saved the $20 I would have had to spend on a pattern. I can't wait to drape a gown for Bascha!
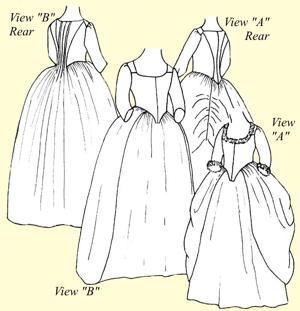
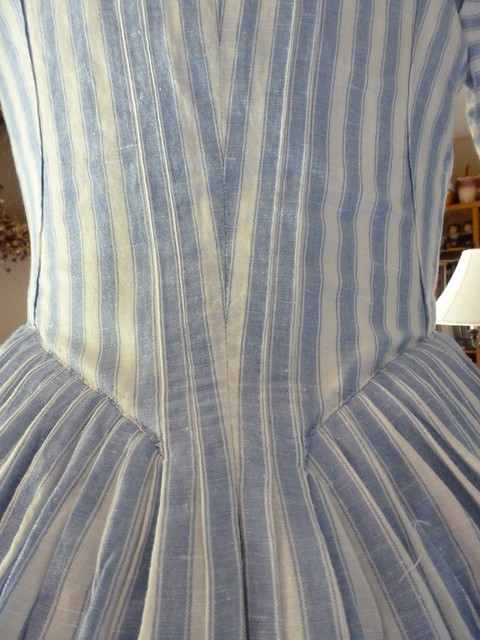
I had seen that 3 seams on the back of gowns during this period were a vast majority. And what I really thought was cool was that on some of these dresses, the pleats at the center back that attached a bodice to the skirt. So I thought I'd try that. To make the pleats in the gown back I laid my mock up back on the linen I was to use for the dress. I then traced that shape onto the linen. After that I took the mock up and slashed it in the center, and also two diagonal lines toward the waist. I laid these now 4 pieces of the gown back onto my linen, inside the traced lines. Then pulling them apart I left 1" in between the far side back and center back on both sides and 2 inches between center backs. This was to allow for the pleats. I then marked the edges of the 4 back pieces so I would know where to pleat on the gown. I cut this out, and the skirt out, making sure I left a 2 inch "channel" in between the bodice and skirt to keep them attached. Here are some pictures showing the 3 seams/pleats that I was going by.
 |
| these pictures were taken off google images...a couple from pinterest, and a couple from Fashionable Frolick |

The entire bodice is lined, but the lining of the bodice back is smooth because I did not have enough linen left to pleat that, much less line the skirt. (The bodice lining is from a large linen dress bought at the thrift store.) Oh, and I did not drape the sleeves, I just used the pattern for those that I used for our jackets. I put 3 pleats on the back of the sleeve.
I hand-sewed this dress and I'm glad that I did. I love the softness hand-sewing gives a garment, and of course the more accurateness of it :).
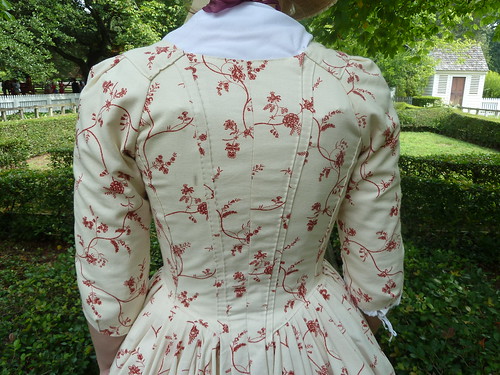
Here are some pictures of the finished dress! I know it looks a wee bit odd without a stomacher or petticoat- I'm still in the midst of making some to match :P
 |
| please forgive the foggy-ness...it's been really rainy here so really humid, and the camera is getting fogged up again. :( |
 |
| I'm a little sad that the pleats didn't do what I had hoped in the back... I guess I need to mess around some more to make them hang right. They are attached to the gown bodice, but it looks like they aren't. Bummer. |
 |
| the white at the top is her shift. |

 |
| I put 3 pleats at the back of the sleeve. |
 |
| the sleeve. |
 |
| the lining on the inside |
~Theresa
No comments:
Post a Comment